WELCOME FELLOW PAPERCRAFTERS!
This week (week 15 of COVID 19 isolation) I am working with the Brushed Paper Packet from Close To My Heart. Brushed is an older paper packet that was "refreshed" with new colors and brought back by popular demand. I love the summer colors.

As you know, I have been working on both Disney scrapbook layouts and my Alaskan Cruise album concurrently, As I was flipping through my Disney photos, it struck me that these colors would be perfect for our Animal Kingdom photos, especially the new "Pandora" section of the park.
I started by creating a "Stitch" layout since we have some older photos with Stitch from way back, when Stitch could be found in Camp Minnie / Mickey. Camp Minnie / Mickey was replaced with Pandora. This layout could easily work for Hawaii photos, Disney Aulani, or any cruise photos since the layout has a tropical flavor.
I was hoping that getting this layout completed would motivate me to use the whole paper packet and create some awesome layouts that are currently showing up in my dreams.

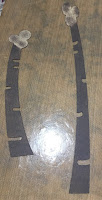
I used a piece of the brushed leafy pattern paper for my background. I cut the tops of the palm trees out of the brushed green dotted patterned paper. I also cut the bottom layer of the Hibiscus flowers out of the bokeh patterned paper. The patterned papers I used are shown below. The remaining Cricut images were all cut using various colored CTMH cardstock.

All of the Cricut images in the cut file are Close To My Heart images or free images so you DO NOT need a Disney cartiridge to make this layout.
When I make my layouts, I don't always cut the colors in the order that Design Space lays out the mats.
- In this case, I cut the Canary (mat #9) first. I inked the edges of the sunshine and adhered to the base of the layout (be sure to cut the branding/zip strip off before adhering the sunshine).
- Next I cut the top layer of the surf board and the leaves using the dark side of Green Apple cardstock (mat #10). I inked the edges of all pieces with Green Apple ink.
- After this, I moved on to the beach. The beach was cut using both the dark side and light side of toffee card stock. I cut larger portion of the beach (mat #7) with the dark side of toffee card stock. The I turned it over and put the uncut portion of the paper to the top of my cricut mat to cut the smaller portion of the beach and the bottom layer of the palm trees (mat #8) from the light side of the toffee cardstock. I inked both section of the beach with toffee ink (refer to picutre) then adhered the left sides together. Wait....don't adhere this to the base page yet, as the water needs to be adhered first.

- This next step is a little tricky. The palm tree consists of 3 layers (bottom -> cut from the light side of toffee cardstock, middle = leaves, and top layer of tree). The top layer of the tree is mat # 6 (dark brown). I was able to cut the tree trunks from the same sheet of cardstock I cut the beach images from. Before cutting, check two things: 1) make sure the images fit on the paper (spin or move to fit as needed), and 2) make sure the dark side is up. I inked the tree trunks using Expresso PIGMENT ink because pigment ink is very wet and can be used almost like paint. Then I dabbed ink onto the coconuts (refer to picture above). Alternatively, you can cut the tree trunks using Espresso Cardstock.
- Wanting to finish the palm trees, I cut mat #11 (the tree tops) usng the green dot patterned paper. I inked the tree tops with green apple to give them definition, then moved to the next step before gluing all the palm tree pieces together. Note: I generally wait 15 minutes between inking and gluing to ensure the ink is dry before I glue all the pieces togehter. This is very important with the pigment ink because it will get everything covered in ink if you don't give it time to dry.
- I cut the water pieces next. I cut the larger water piece (mat # 12) using the dark side of glacier, then cut the wave (mat #13) using the dark side of Lagoon cardstock. If you like, you could cut the larger water piece using the light side of the lagoon cardstock. I wanted a stronger contrast so I used a lighter color for the water versus the wave. I inked the wave and the top of the water using lagoon ink, then I adhered them together. Before adhering the water to the base sheet, I cut it at the 2 1/4 inch point since it is only 11.5 inches long. I adhered the shorter water piece to the left side and the longer water piece to the right side.

- After adhering the water pieces, I glued down the beach and then the palm trees, followed by the surf board. I use this method so I don't lose any peices as I go along.
- I moved to the flowers next. As mentioned earlier, I cut the bottom layer of the flowers using the bakeh patterned paper. I cut a 6x4 piece from the darkest portion of the paper (as shown on the right below). Before cutting the images, I changed the mat size (mat #3) to 4x6 as shown on the left below. This forces Design Space to put all the images on the paper,

- Having cut the bottom layer of the flowers, I cut the white images (mat #1). I adhered the 3 white flower tops to the bottoms, then inked the edges of the flowers using Pixie ink.
- To finish the flowers, I cut the pixie flower images (mat #4). Again I adhered the pixie flowers to the bokah patterned paper, then inked 3 flowers with Pixie ink..
- To finish off the flowers, I cut the black next. To avoid losing any of the pistils. I peeled then off the Cricut mat one by one and adhered to the flowers before remvoing the next pistil. After finishing the flowers, I adhered the photo mat, all but the one small white flower and the leaves that go with the flowers.
- The last three mats/colors are Ballerina (the insides of Stitchs ears and his tongue),the light blue (dark side of Carolina) and the dark blue (dark side of bluebird). I cut these colors and layered Stitch together.


The highlights I added to Stich included using the black journalling pen to add his upper lip and outline his nose. I also used a white gel pen to add the whites of his eyes.
The last steps to the layout are to adhere Stitch and the final flower.
All in all, I LOVE the way this layout turned out. All of the Cricut images in the cut file are Close To My Heart images or FREE images so you DO NOT need a Disney cartiridge to make this layout.
If you would like to create this layout me, contact me to purchase the Cricut DS file.
However, the Cricut cut files can be used with CTMH cardstock and other items you have in your stash to complete this layout.
No comments:
Post a Comment